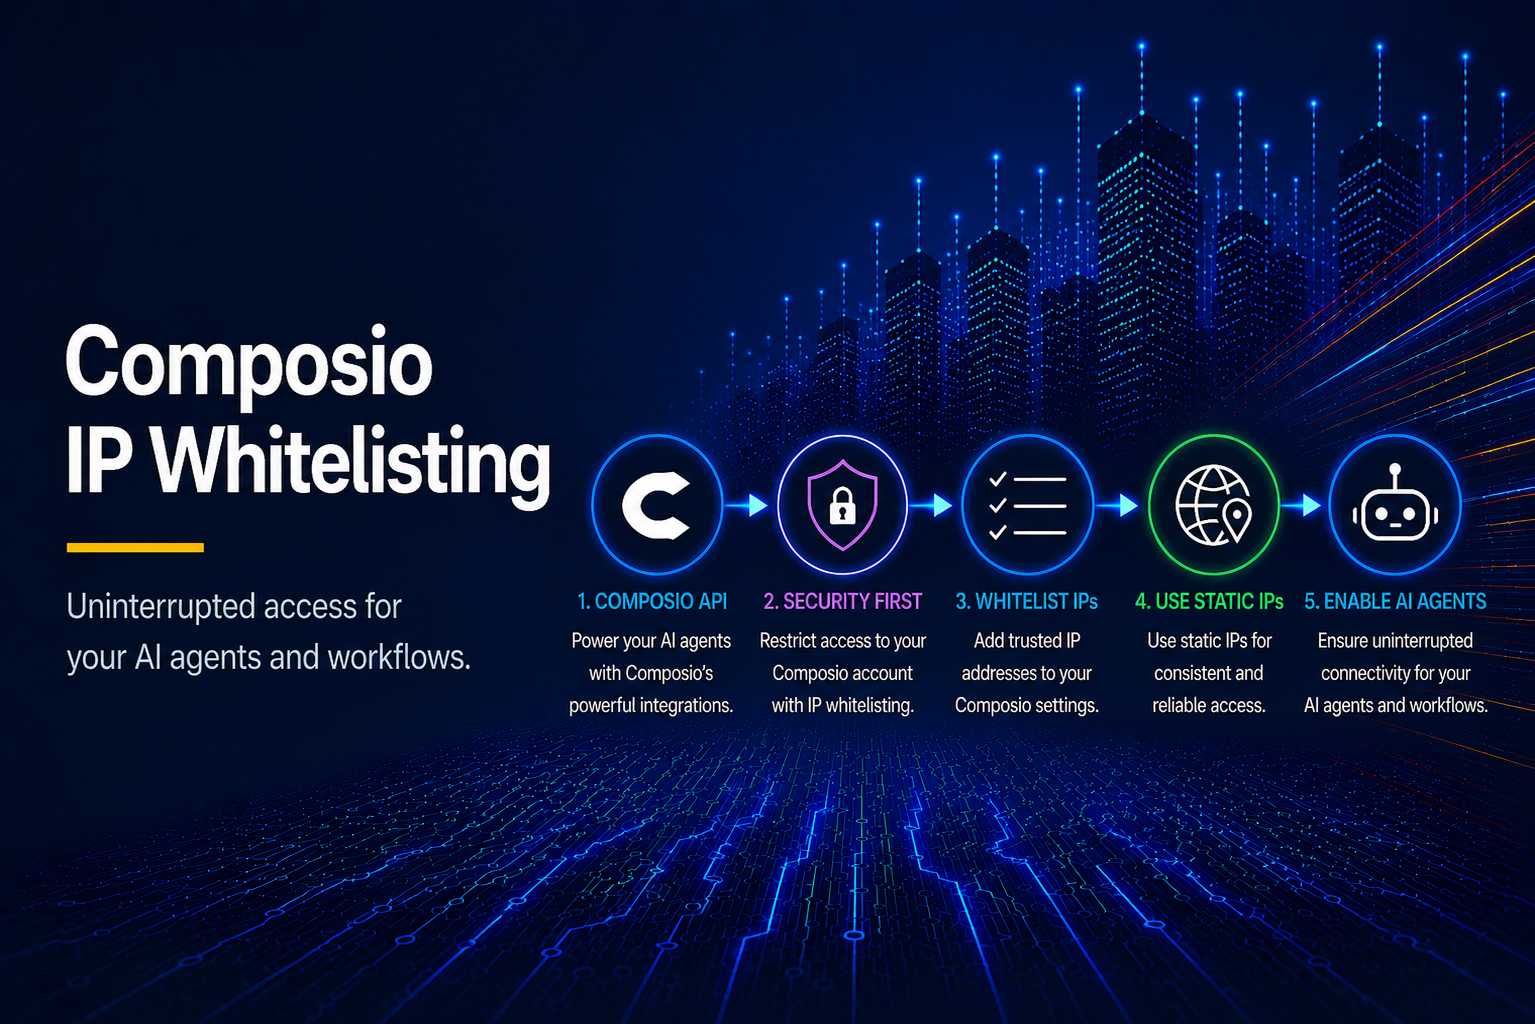
Composio recommended IP whitelisting following the May 2026 security incident that exposed several API keys. In response, Composio released an IP allowlisting feature that allows users to restrict access to specific static IPs, which dynamic cloud environments don't provide out of the box.
So, if you are hitting a 403 (Forbidden) error in production after checking for broken payloads or log anomalies, check that your requests are leaving from an address on that API key’s allowlist.
In this guide, you will learn how to route traffic through static IPs and add them to your Composio allowlist.
Key Takeaways
- Composio applies IP whitelisting per API key, not per project or per org. You must configure whitelists individually for every key your application uses.
- Static IPs are safer for IP whitelisting because they give your workloads a fixed network identity. However, egress IPs from cloud providers are dynamic and will cause failed requests on Composio when they change.
- IP whitelisting and IP allowlisting on Composio mean the same thing: scoping the API key to a set of IP addresses.
- A request from an unlisted address is blocked even when the key is valid.
- Get static EU egress IPs from OutboundGateway with ease, implement with minimal configuration in your code, and add them to your Composio API key IP allowlist.
Table of Contents
- Key Takeaways
- What Composio Is and What It Does
- What IP Whitelisting Means on Composio
- Making Your First Composio Tool Call
- Why Your Composio Egress IP Changes Without Warning
- Route Composio Traffic Through a Static EU IP with OutboundGateway
- IP Whitelisting for Composio's MCP Endpoints
- Keep Your Composio Keys Restricted, Wherever They Run
- Static IPs for Composio Frequently Asked Questions
What Composio Is and What It Does
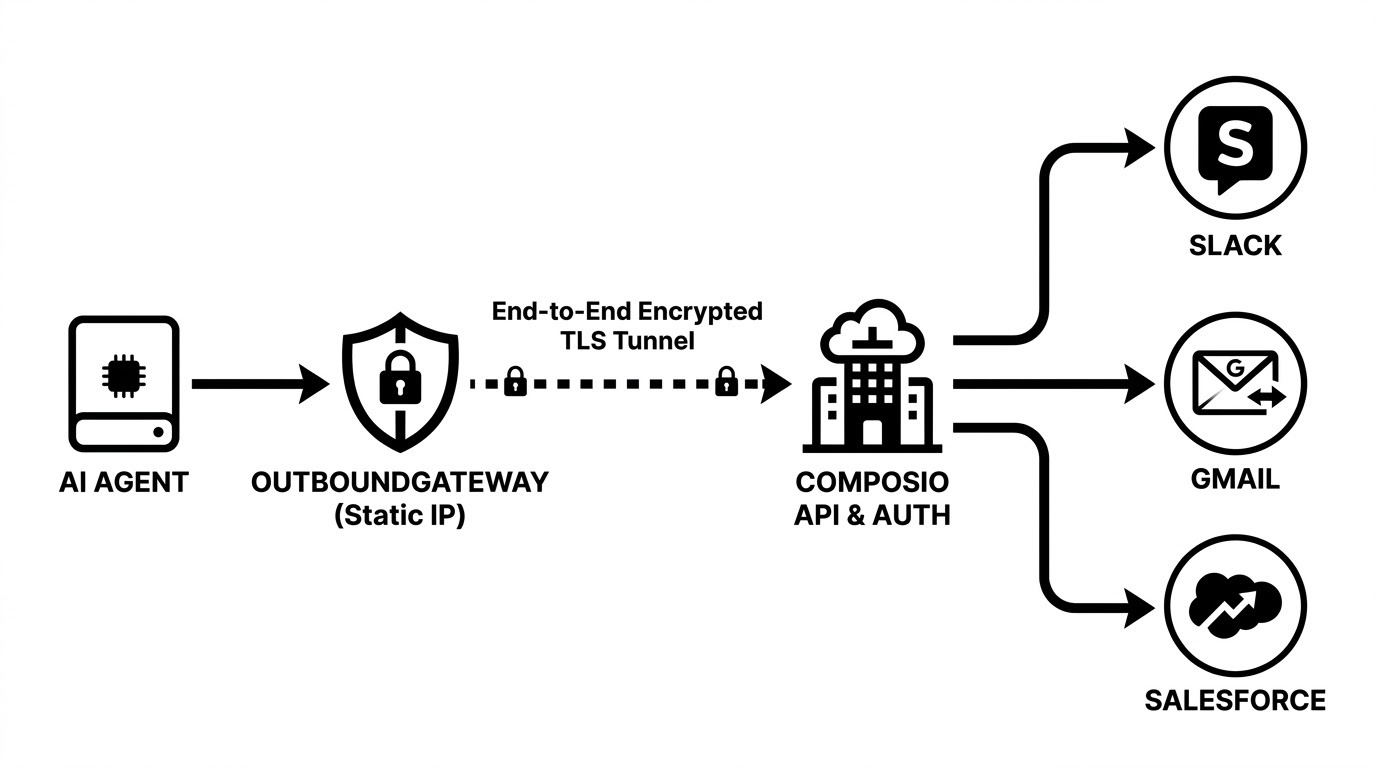
Composio is an integration platform that connects your AI agents to tools from 1,000+ SaaS applications (Gmail, Salesforce, Slack, etc.) through a single API. It handles tool discovery, authentication, and execution, so you can focus on building the agent itself, not the integration workload.
In practice, that means you skip the usual chore of writing and maintaining your own OAuth flows, managing token storage, and building custom API wrappers for every tool your AI agent needs to access. Your application maintains a single project API key, sent in the x-api-key header, and Composio stores and refreshes credentials for all connected apps in one place.
The API exposes each app as a ready-made, LLM-optimized tool; for example, your agent calls GMAIL_FETCH_EMAILS, and Composio handles the authentication and the underlying API call.
Teams adopt Composio for the following reasons:
- Teams can easily swap models without changing integrations because each session works with any LLM provider you plug into the Composio SDK.
- Composio stores each user’s connected‑account credentials centrally and refreshes them automatically. You only need one project API key and the platform’s auth configs to handle all downstream services.
- Tools keep working through upstream API changes because the wrapper is maintained centrally rather than in your codebase.
From a networking standpoint, your application servers communicate with exactly one external host. Because your code never opens direct connections to Gmail's, Slack's, or Salesforce's servers, you don’t have to manage IP allowlist updates for each underlying provider.
You only need to secure the network path between your servers and Composio. If you can lock down your outbound connections to stable IP addresses from reliable providers like OutboundGateway, you establish a strong security perimeter for all downstream AI workflows.
What IP Whitelisting Means on Composio
IP whitelisting (also called IP allowlisting) on Composio means Composio restricts the IP addresses that can use your API keys. Flagged IP addresses can’t use Composio resources, and Composio blocks requests from any other IP (even ones with a valid key).
It is important to note that, unlike OpenRouter, IP whitelisting isn’t a lockdown platform setting; developers can change the list of allowed IPs in the dashboard.
The most critical distinction of IP whitelisting for Composio is that it is applied per key, not per project, so you manage IP lock on a key-by-key basis. If you create multiple credentials, you configure a separate Composio API key IP allowlist for each one: for example, a production key is allowlisted to your backend's static IP, and a dev key is allowlisted to your local machine.
That way, your backend servers and local development runners operate under completely independent networks.
Difference between scoped permissions and IP whitelisting on Composio
Scoped permissions define what the API key can call, i.e., different permission areas and access levels it can reach, such as read‑only access to tools, ability to list connected accounts, etc. Separately, IP whitelisting restricts where a request can originate, rejecting any call from an unauthorized source IP.
In short, scoped permissions control the actions a key can perform, while IP allowlisting controls the network locations from which those actions may be initiated.
Making Your First Composio Tool Call
First, follow the steps below to retrieve your account credentials from Composio:
- Create a Composio account. You’ll be taken to their dashboard.
- Open the "API Keys" page from the left sidebar and click "Create Key".
- Give the API key a descriptive name and configure its permission level.
- Copy the value immediately. Composio shows the key once.
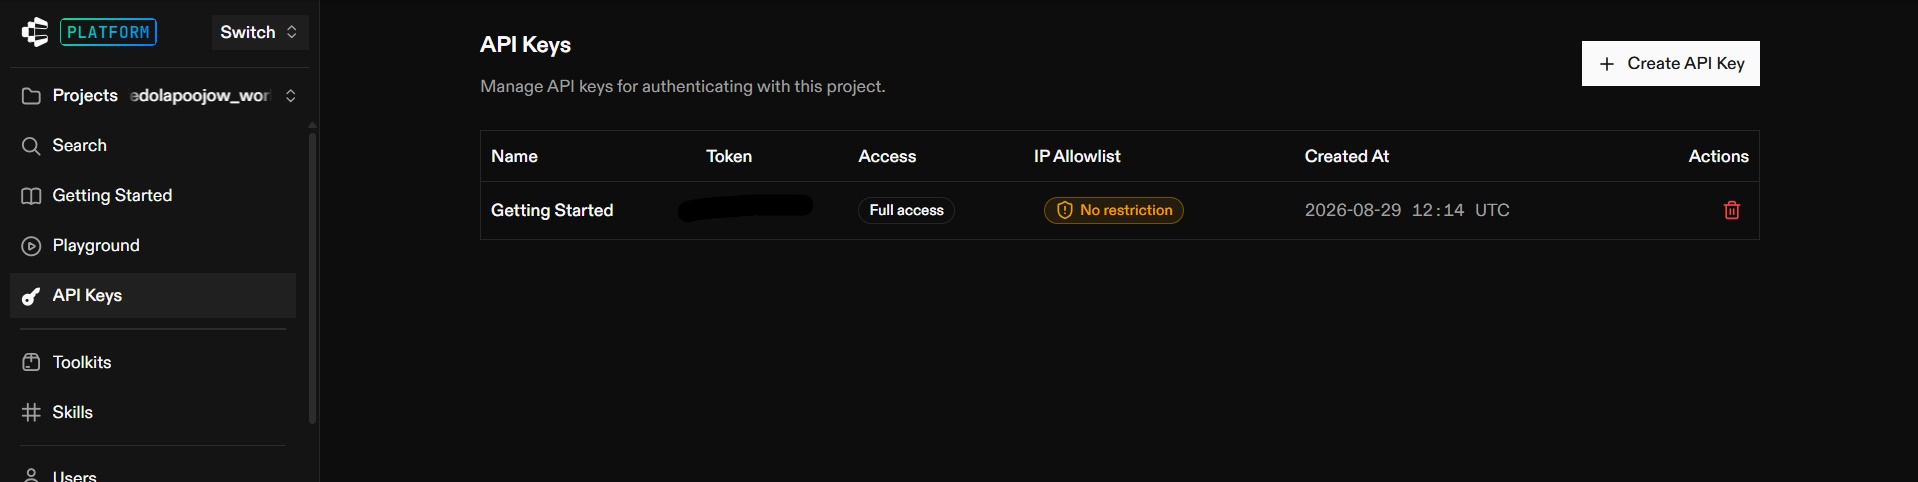
- Store it in your environment. In Command Prompt on Windows:
set "COMPOSIO_API_KEY=xx_..." (Use export on Mac or Linux instead of "set")
Remember to keep the double quotes around the API key to prevent the code from storing trailing spaces.
- Install the SDK with
pip install composio, ornpm install @composio/corefor Node.js. The versions installed werecomposio0.21.0 on Python 3.13.3,@composio/core0.17.0 withundici7.29.0 on Node v22.17.0. Note that installing Composio on Ubuntu requires a virtual environment.
Sending your first tool call
This section uses COMPOSIO_LIST_TOOLKITS. It needs no connected account, so there is no OAuth flow to finish first, but it travels the same authenticated path to backend.composio.dev as every other tool call. Code examples are in Python and Node.js.
- Read the key from the environment and create the client:
import os

import requests

from composio import Composio

composio = Composio(api_key=os.environ["COMPOSIO_API_KEY"])
In Node.js:
import { Composio } from '@composio/core';

const composio = new Composio({ apiKey: process.env.COMPOSIO_API_KEY });
- Execute the tool:
result = composio.tools.execute(

    "COMPOSIO_LIST_TOOLKITS",

    user_id="default",

    version="00000000_00", # base version

    arguments={},

    )
In Node.js:
const result = await composio.tools.execute('COMPOSIO_LIST_TOOLKITS', {

    userId: 'default',

    version: '00000000_00',// base version

    arguments: {},

});
- Print the toolkits the key can reach:
print("successful:", result["successful"])

for toolkit in result["data"]["toolkits"][:5]:

    print("  -", toolkit["slug"])
In Node.js:
console.log('successful:', result.successful);

for (const toolkit of result.data.toolkits.slice(0, 5)) {

    console.log('  -', toolkit.slug);

}
- Print the IP address the request left from:
print(requests.get("https://api.ipify.org", timeout=10).text)
In Node.js:
console.log(await fetch('https://api.ipify.org').then((r) => r.text()));
Here's the full script:
import os

import requests

from composio import Composio

composio = Composio(api_key=os.environ["COMPOSIO_API_KEY"])

result = composio.tools.execute(

    "COMPOSIO_LIST_TOOLKITS",

    user_id="default",

    version="00000000_00",

    arguments={},

)

print("successful:", result["successful"])

for toolkit in result["data"]["toolkits"][:5]:

    print("  -", toolkit["slug"])

egress = requests.get("https://api.ipify.org", timeout=10).text

print("egress IP:", egress)
In Node.js:
import { Composio } from '@composio/core';

const composio = new Composio({ apiKey: process.env.COMPOSIO_API_KEY });

const result = await composio.tools.execute('COMPOSIO_LIST_TOOLKITS', {

  userId: 'default',

  version: '00000000_00',

  arguments: {},

});

console.log('successful:', result.successful);

for (const toolkit of result.data.toolkits.slice(0, 5)) {

  console.log('  -', toolkit.slug);

}

const egress = await fetch('https://api.ipify.org').then((r) => r.text());

console.log('egress IP:', egress);
Note: @composio/core ships as an ES module on Node.js. So save the file with an .mjs extension or set "type": "module" in your package.json.
Run with:
py first_call.py for Python, and node firstCall.mjs for Node.js.
Here's the response:
successful: True

    - gmail

    - composio

    - github

    - googlecalendar

    - notion

egress IP: 198.51.100.1
Remember that egress IPs from cloud providers change over time, so they aren’t dependable. Prefer static IPs from a reliable provider like OutboundGateway.
Note: If you're on macOS or Linux, the following rules apply:
- Run it with python3, not py.
- Set the variable with export:
export COMPOSIO_API_KEY="xx_..." - Installing Composio on Ubuntu 24.04 needs a virtual environment.
Why Your Composio Egress IP Changes Without Warning
Modern hosting platforms do not give your application a fixed outbound IP by default. If you need one, you are looking at a paid static-IP feature or extra infrastructure, such as a NAT (Network Address Translation) gateway with an Elastic IP. However, a NAT gateway comes with downsides like setup complexity, maintenance overhead, recurring infrastructure costs, and more.
If your application relies on a dynamic egress IP, establishing a reliable Composio static egress IP comes with some bottlenecks:
| Platform | Outbound IP Behavior | Why it changes |
|---|---|---|
| AWS Lambda | Dynamic per invocation window | When an AWS Lambda function hasn't been used for a while, or when scaling routes through different physical hypervisors (see Lambda static IPs). |
| Render / Fly.io | Dynamic per deployment, container reschedule, or region | Render uses shared regional Classless Inter-Domain Routing (CIDR) to whitelist IP address ranges with a single rule, and it sells Dedicated IPs. Fly.io rotates dynamic egress IPs unless you explicitly provision static egress add-ons. |
| Heroku | Dynamic per dyno restart | Daily restarts pull a fresh IP from shared AWS pools. |
| Kubernetes | Dynamic per node Container Network Interface (CNI) | Pods egress through node public IPs unless a NAT gateway is configured (see static IPs for Kubernetes). |
Most teams reach for one of these two workarounds:
- Setting up Squid or HAProxy on a VPS leaves you patching, monitoring, and load-balancing this extra infrastructure.
- Route your requests through a static egress IP provider like OutboundGateway, and Composio sees a stable source IP you can whitelist.
Route Composio Traffic Through a Static EU IP with OutboundGateway
First, retrieve your proxy details from OutboundGateway via the following steps:
- Create an account on OutboundGateway. You have a 7-day free trial.
- Open "Proxy info" once your account is active. Everything you need is on one page: plan, region, credentials, and your IP addresses.
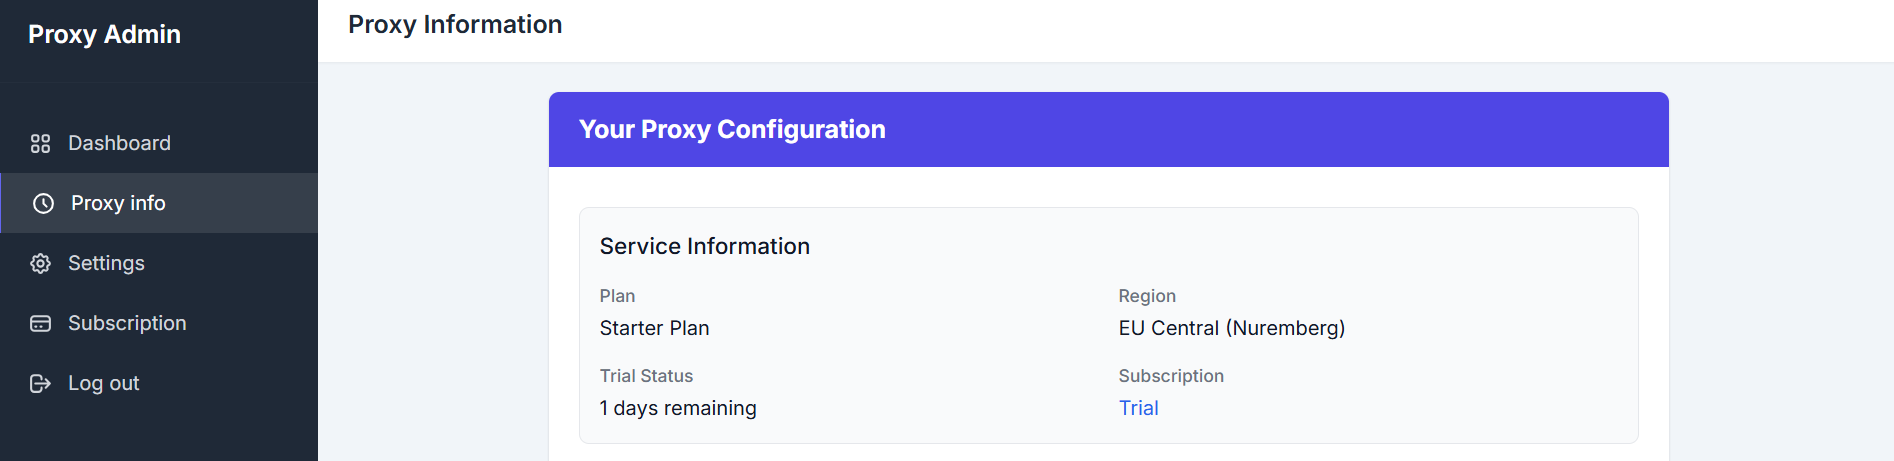
- Note the host and port:
<your-proxy-host>:<your-port> - Copy the username and password. These are your proxy credentials.
- Store the username, password, host, and port as one URL. Store it in the same environment as your Composio key:
set "OUTBOUND_PROXY=https://your_name:your_password@<your-proxy-host>:<your-port>"
Replace “your_name” and “your_password” with the real values.
Point Composio at the static egress proxy
- Read both secrets from the environment:
import os

import sys

import requests

from composio import Composio

key = os.environ.get("COMPOSIO_API_KEY")

proxy = os.environ.get("OUTBOUND_PROXY")

if not key or not proxy:

      sys.exit("Set COMPOSIO_API_KEY and OUTBOUND_PROXY first.")
In Node.js:
import { setGlobalDispatcher, ProxyAgent } from 'undici';

import { Composio } from '@composio/core';

const key = process.env.COMPOSIO_API_KEY;

const proxy = process.env.OUTBOUND_PROXY;

if (!key || !proxy) {

    console.error('Set COMPOSIO_API_KEY and OUTBOUND_PROXY first.');

    process.exit(1);

}
- Route the client through the proxy. The Composio Python SDK is built on httpx, which reads the HTTPS_PROXY variable from the environment:
proxies = {"http": proxy, "https": proxy}

os.environ["HTTPS_PROXY"] = proxy
In Node.js: First, install undici with npm install undici. Node's built-in fetch ignores HTTPS_PROXY, so you set a global dispatcher instead.
setGlobalDispatcher(new ProxyAgent(proxy));
- Test your proxy configuration by printing your egress address twice, with and without the proxy:
print("--- egress WITHOUT the proxy ---")

print(requests.get("https://api.ipify.org", timeout=30).text)

print("\n--- egress WITH the proxy ---")

print(requests.get("https://api.ipify.org", proxies=proxies, timeout=60).text)
In Node.js:
call fetch once before setGlobalDispatcher and once after:

console.log('--- egress WITHOUT the proxy ---');

console.log(await fetch('https://api.ipify.org').then((r) => r.text()));

setGlobalDispatcher(new ProxyAgent(proxy));

console.log('\n--- egress WITH the proxy ---');

console.log(await fetch('https://api.ipify.org').then((r) => r.text()));
- Send your tool call via the static IP:
composio = Composio(api_key=key)

result = composio.tools.execute(

    "COMPOSIO_LIST_TOOLKITS",

    user_id="default",

    version="00000000_00",

    arguments={},

)

print("successful:", result["successful"])
In Node.js:
const composio = new Composio({ apiKey: key });

const result = await composio.tools.execute('COMPOSIO_LIST_TOOLKITS', {

  userId: 'default',

  version: '00000000_00',

  arguments: {},

});

console.log('successful:', result.successful);
Here's the full script:
import os

import sys

import requests

from composio import Composio

key = os.environ.get("COMPOSIO_API_KEY")

proxy = os.environ.get("OUTBOUND_PROXY")

if not key or not proxy:

    sys.exit("Set COMPOSIO_API_KEY and OUTBOUND_PROXY first.")

proxies = {"http": proxy, "https": proxy}

print("--- egress WITHOUT the proxy ---")

print(requests.get("https://api.ipify.org", timeout=30).text)

print("\n--- egress WITH the proxy ---")

print(requests.get("https://api.ipify.org", proxies=proxies, timeout=60).text)

os.environ["HTTPS_PROXY"] = proxy          # <- routes every Composio call

print("\n--- Composio tool call through the proxy ---")

composio = Composio(api_key=key)

result = composio.tools.execute(

    "COMPOSIO_LIST_TOOLKITS",

    user_id="default",

    version="00000000_00",

    arguments={},

)

print("successful:", result["successful"])

for toolkit in result["data"]["toolkits"][:5]:

    print("  -", toolkit["slug"])
In Node.js:
import { setGlobalDispatcher, ProxyAgent } from 'undici';

import { Composio } from '@composio/core';

const key = process.env.COMPOSIO_API_KEY;

const proxy = process.env.OUTBOUND_PROXY;

if (!key || !proxy) {

  console.error('Set COMPOSIO_API_KEY and OUTBOUND_PROXY first.');

  process.exit(1);

}

console.log('--- egress WITHOUT the proxy ---');

console.log(await fetch('https://api.ipify.org').then((r) => r.text()));

setGlobalDispatcher(new ProxyAgent(proxy));   // <- routes every Composio call

console.log('\n--- egress WITH the proxy ---');

console.log(await fetch('https://api.ipify.org').then((r) => r.text()));

console.log('\n--- Composio tool call through the proxy ---');

const composio = new Composio({ apiKey: key });

const result = await composio.tools.execute('COMPOSIO_LIST_TOOLKITS', {

  userId: 'default',

  version: '00000000_00',

  arguments: {},

});

console.log('successful:', result.successful);

for (const toolkit of result.data.toolkits.slice(0, 5)) {

  console.log('  -', toolkit.slug);

}
Run with:
py composio_proxy.py or node composioProxy.mjs
Here's the output:
--- egress WITHOUT the proxy ---

198.51.100.x

--- egress WITH the proxy ---

203.0.113.x  (your static egress proxy goes here)

--- Composio tool call through the proxy ---

successful: True

  - gmail

  - composio

  - github

  - googlecalendar

  - notion
The result shows two different addresses. The first is from your ISP or cloud platform, while the second is your static egress IP from OutboundGateway.
Note: Your account has two static IPs, and your proxy address alternates between them at random, per connection. Register both on the key's allowlist, not only the address you observed, to prevent intermittent breaks.
Add static IPs to the API key’s IP allowlist
- Sign into Composio.
- Go to “API Keys” on the left sidebar.
- Navigate to the row containing the API key(s) you want to whitelist and click on the "No Restriction" button located beside each key.
- Add the two static IP addresses your application calls Composio from.
- Save. This will create a green background with the text “2 IPs” on your dashboard. Composio now blocks every request to that key from any other address.
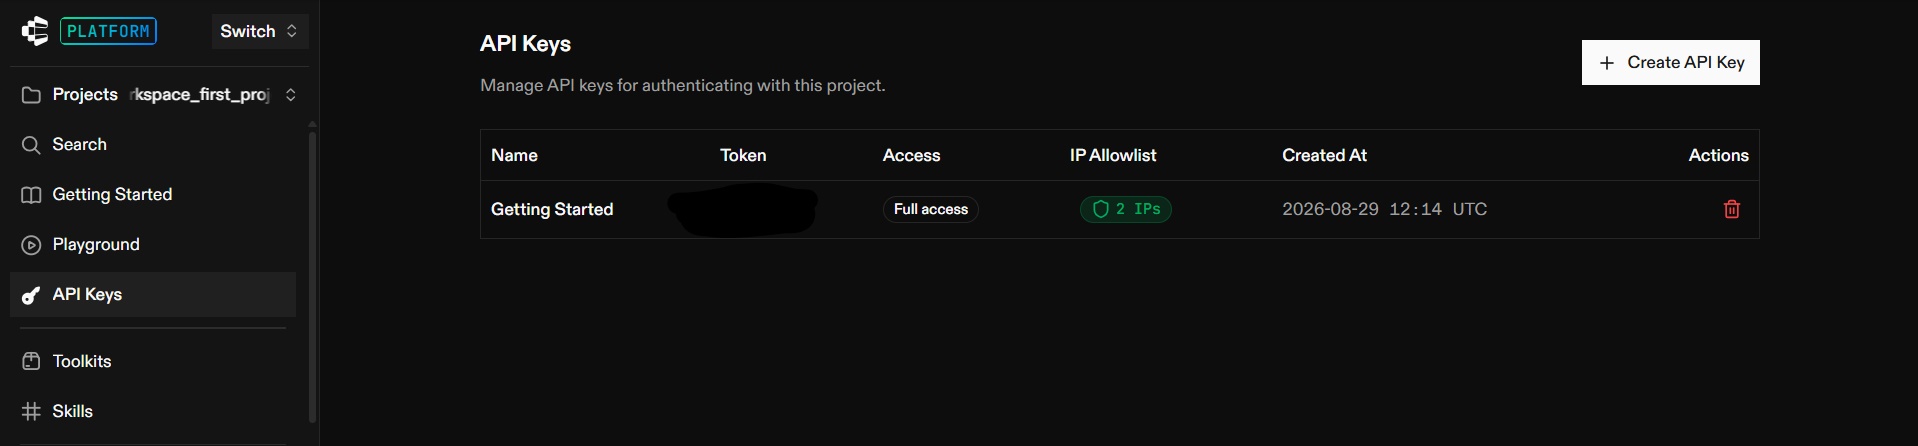
A call from an address that is not on the key's allowlist returns a failed result with this error: “... This request comes from IP address 198.51.100.x, which is not in this API key’s IP allowlist…”

IP Whitelisting for Composio's MCP Endpoints
Composio does not have a separate MCP-only IP allowlist. Composio attaches IP restrictions to the API key and checks each MCP request against that key's allowlist. So when a request authenticates with an API key, its IP allowlist applies to MCP traffic the same way it applies to any other API call.
In practice, this means that if you set an IP allowlist for a project API key, it also covers your MCP requests. If you need controls beyond individual keys, you must handle them at your network layer, either through custom firewall rules or by routing outbound traffic through a static egress proxy like OutboundGateway, so you have a stable IP to whitelist.
Keep Your Composio Keys Restricted, Wherever They Run
Whether your agent reaches Composio through the SDK or through an MCP endpoint, the API key is what carries the allowlist. Restrict every key to addresses you control and protect your infrastructure using OutboundGateway’s egress static IPs.
With minimal configuration, OutboundGateway provides cloud-agnostic EU-hosted static IP pairs for your production workloads.
Start your 7-day trial with OutboundGateway to assign static egress IPs to your Composio keys.
Built with ❤️ for EU businesses who care about privacy and sovereignty.
Static IPs for Composio Frequently Asked Questions
Is Composio's IP whitelist set per API key or per project?
It is set per API key, not per project. The operational consequence is that you must configure the Composio API key IP allowlist for each key individually. However, one key’s allowlist does not affect any other keys in the same project or organization.
Why does Composio return a 403 when my API key is valid?
Two things can cause this error. First, the scope: your key's permission areas don't cover the action you are calling. For example, a read-only key hitting a tool-execution POST endpoint. Second, the IP allowlist: the request's source IP is not on that key's configured allowlist.
Should I create a Composio key with no IP restrictions instead?
If you remove the IP allowlist, the key can be used from anywhere, which weakens security. Instead, create a scoped key with the minimal permission set you need, and keep the IP‑allowlist (or a narrow one) to protect it. Use OutboundGateway as the static egress IP provider for your Composio IP allowlist.