Table of Contents
- What Is a NAT Gateway in AWS?
- How a NAT Gateway Works
- Types of NAT Gateways
- Advantages of a NAT Gateway
- Disadvantages and limits of a NAT Gateway
- How to Create a NAT Gateway on AWS
- Alternatives to a NAT Gateway
- Conclusion
- NAT Gateway Frequently Asked Questions
A NAT gateway lets resources in a private subnet start connections to the internet. So, every request leaves through the gateway's public IP.
A NAT gateway often enters your stack because after you deploy a Lambda function inside a VPC to call a payment partner's API, the partner requests the IP address your calls come from, but your function has no internet access nor IP address. So you add a NAT gateway with an Elastic IP, and the calls go through.
This article explains what a NAT gateway is, its types, the main advantages and limits, and how to create one in the AWS console, using Terraform, and valid alternatives like OutboundGateway, for teams that need a fixed outbound IP.
Key Takeaways
- A NAT gateway gives resources in a private subnet outbound internet access through a public IP.
- When you create a NAT gateway, AWS asks for two choices: a connectivity type (public or private) and an availability mode (zonal or regional).
- AWS bills a NAT gateway for every hour it exists and every GB it processes. One idle gateway in Frankfurt costs about $41.61 a month with its public IP, as of October, 2026.
- If you run a NAT gateway only to give a partner a fixed IP, a static outbound IP proxy such as OutboundGateway is a cheaper alternative.
What Is a NAT Gateway in AWS?
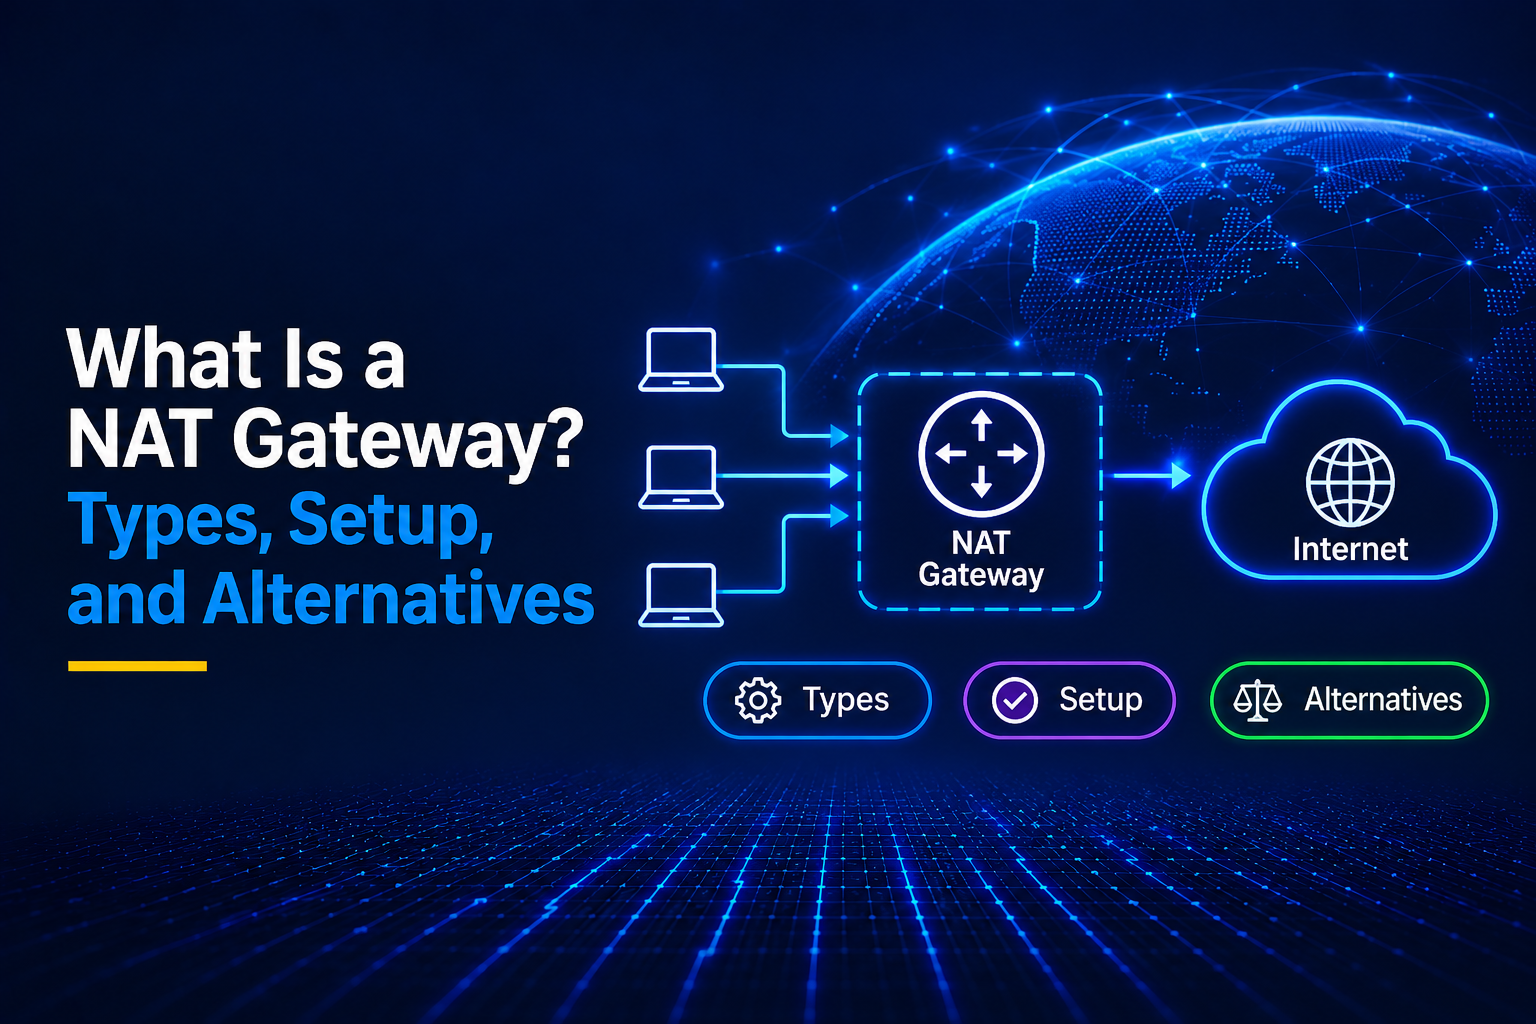
An AWS Network Address Translation (NAT) Gateway is a managed service that lets resources with private IP addresses communicate with external networks. When a resource sends outbound traffic, the destination sees the NAT gateway's public egress IP address, which is why teams sometimes share that address with partners for allowlisting.
However, relying on a NAT gateway's egress IP for partner allowlisting can create operational risk if the gateway or its public IP configuration is replaced, reconfigured, or migrated. For more dependable partner allowlisting, route third-party API traffic through a dedicated static IP instead. Our guide to IP whitelisting covers this approach and best practices for managing allowlisted access.
AWS manages the NAT Gateway for you, including maintenance and scaling. A zonal NAT Gateway is created in one Availability Zone (AZ) and includes redundancy within that AZ. It starts with 5 Gbps of bandwidth and automatically scales up to 100 Gbps as traffic increases.
You cannot attach a security group directly to a NAT Gateway. Instead, you use security groups on the instances or other resources behind it to control traffic. You can also use Network Access Control Lists (ACLs) to control traffic to and from the NAT Gateway's subnet.
A public NAT Gateway lives in your VPC, usually in a public subnet. Your application does not connect to it like a proxy. Instead, the route table for the private subnet sends internet-bound traffic to the NAT Gateway, which forwards it through the VPC's internet gateway.
AWS networking uses several similarly named components, which can be easy to mix up. If you have heard of an internet gateway, NAT Gateway, or NAT instance, here is how they differ.
NAT gateway vs. internet gateway vs. NAT instance
| Option | Traffic Direction | Who manages it | Cost |
|---|---|---|---|
| Internet gateway | Allows communication between a VPC and the internet. With a public IPv4 or IPv6 address, resources can send outbound traffic and receive inbound connections. | AWS manages the gateway and requires a public IP on the instance. | This is free, but EC2 data transfer rates apply. |
| NAT gateway | Lets private-subnet resources start outbound-only connections but does not allow inbound connections. | AWS manages it. | Hourly charge plus a per-gigabyte (GB) processing charge; standard data transfer charges may apply. |
| NAT instance | Lets private-subnet resources start outbound-only connections but does not allow inbound connections. | You manage an EC2 instance, including patching, security groups, and failover. | Standard EC2 instance charges (plus public IPv4 fee). |
Other cloud providers offer similar services under different names. For example, Microsoft Azure calls its service Azure NAT Gateway, and Google Cloud calls it Cloud NAT.
How a NAT Gateway Works
A NAT gateway uses two route tables and performs two address translations. A route table is a set of rules that tells network traffic where to go. Address translation means replacing one IP address with another as traffic moves between private and public networks.
The example below follows one HTTPS request from an instance in a private subnet to an external API.
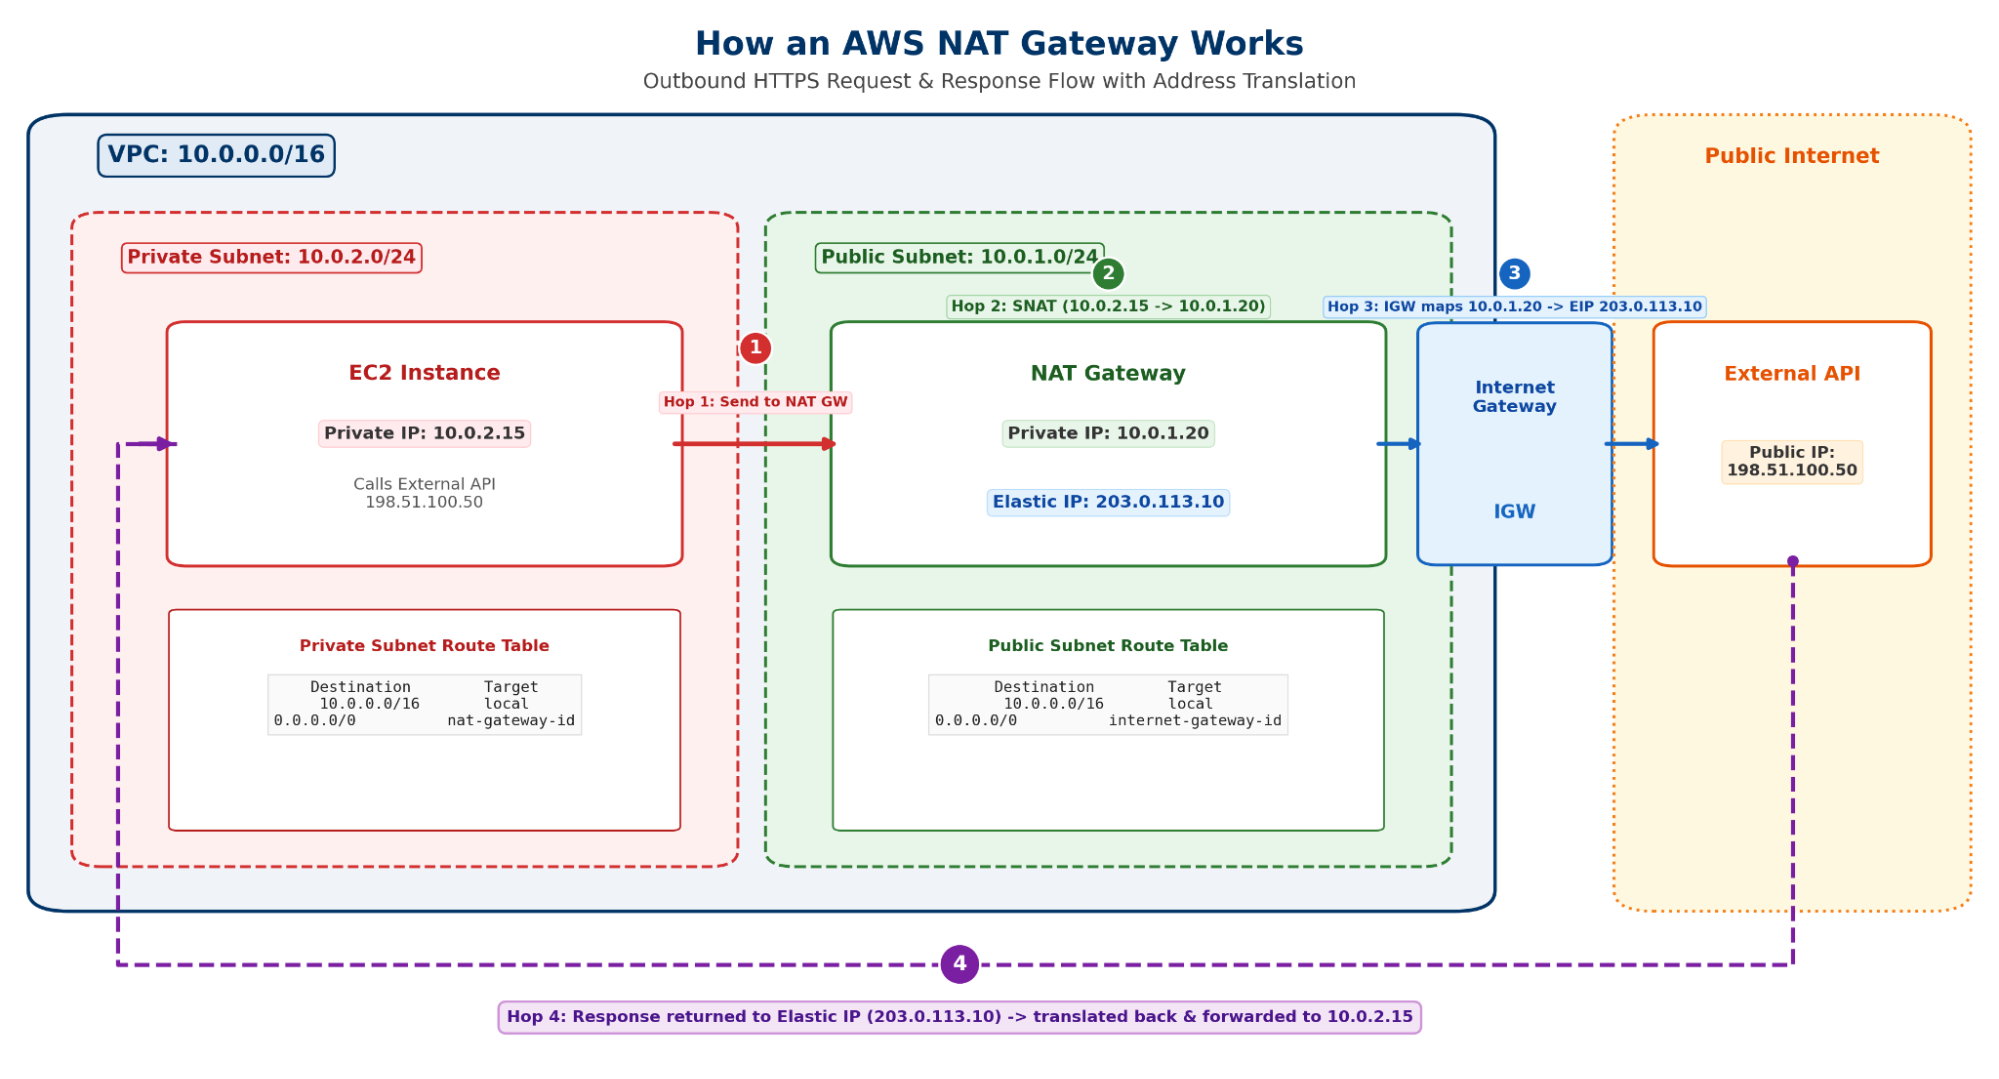
- The instance at
10.0.2.15calls an external API at198.51.100.50.Its subnet route table sends internet traffic to the NAT gateway. - The NAT gateway, which sits in the public subnet, replaces the instance's source IP address,
10.0.2.15,with its own private IP address,10.0.1.20. - The internet gateway then replaces the NAT gateway's private IP address with its Elastic IP address,
203.0.113.10.The external API sees only203.0.113.10,not the instance's private IP. - When the API replies, the response returns to the Elastic IP. The NAT gateway remembers which private instance started each connection, translates the address back, and forwards the reply to
10.0.2.15.
An external service cannot start a connection to the instance. The connection must begin inside the VPC. The instance can receive replies only for connections it initiated.
That is the core security benefit: private resources get outbound internet access without being directly reachable from the internet.
The route tables
The private subnet sends internet-bound traffic to the NAT gateway:
| Destination | Target |
|---|---|
| 10.0.0.0/16 | local |
| 0.0.0.0/0 | nat-gateway-id |
The public subnet sends internet traffic to the internet gateway:
| Destination | Target |
|---|---|
| 10.0.0.0/16 | local |
| 0.0.0.0/0 | internet-gateway-id |
AWS uses this same routing pattern in its NAT gateway examples: private subnets route internet traffic to a NAT gateway, while the NAT gateway's public subnet routes internet traffic to an internet gateway.
Types of NAT Gateways
When you create a NAT gateway, AWS asks two questions:
- Connectivity type: public or private
- Availability mode: zonal or regional
These choices are mostly separate, but with one important exception: regional mode works only with public NAT gateways. Private NAT gateways are always zonal.
Public vs private NAT gateways
This choice determines where the traffic can go. A public NAT gateway is the default. It needs an Elastic IP address when you create it and a route to an internet gateway. Resources in private subnets can use it to reach the internet.
A private NAT gateway cannot use an Elastic IP. Instead, it connects private subnets to other VPCs or on-premises networks through a transit gateway or a virtual private gateway. If you send its traffic to an internet gateway, AWS drops that traffic.
A common use case for a private NAT gateway is connecting networks that use overlapping private IP address ranges.
Zonal vs regional NAT gateways
This choice determines how the gateway is deployed across Availability Zones (AZs).
A zonal NAT gateway is the traditional model. You create one gateway in each Availability Zone that needs outbound access. Each gateway sits in its own public subnet, and each private subnet needs a route to the gateway in its own zone.
If the Availability Zone containing a zonal NAT gateway fails, workloads that route through that gateway lose internet access.
A regional NAT gateway is newer. You create one gateway for the whole VPC, rather than one per Availability Zone. It does not need a public subnet. AWS creates its route table automatically and adds a route to the internet gateway.
When workloads start in a new Availability Zone, the regional NAT gateway can expand into that zone. This expansion can take up to 60 minutes.
Regional NAT gateways have some limitations:
- They support public connectivity only. For private NAT, use a zonal NAT gateway.
- They do not support constrained Availability Zones.
So, what gateway is the best? The choice is simple:
- Public plus zonal: good for a simple test, a single Availability Zone, or when you want direct control of one gateway per zone.
- Public plus regional: usually better for production workloads spread across multiple Availability Zones, because AWS handles multi-zone expansion and routing for you.
- Private plus zonal: use this when you need private connectivity between VPCs or on-premises networks, especially with overlapping IP ranges.
Advantages of a NAT Gateway
Private resources stay private
A database server or a Lambda function connected to your VPC can download operating-system updates, install packages from npm or PyPI, and call services such as Stripe without having its own public IP address. Resources behind a public NAT gateway can make outbound connections to the internet, but the internet cannot initiate new inbound connections to those resources.
A predictable outbound IP address
A public NAT gateway uses an Elastic IP, a static public IPv4 address that stays assigned to your AWS account until you release it. In a simple setup with one NAT gateway, this gives your private resources one predictable outbound IP address that partners can add to their allowlist.
If you use one NAT gateway in each Availability Zone, or a regional NAT gateway that can add IP addresses automatically, make sure you allowlist every outbound IP address.
No servers to manage
A NAT instance is an EC2 server that you set up and maintain yourself. You must patch its operating system and arrange failover if it stops working. A Squid proxy on a VPS has the same maintenance burden.
A NAT gateway avoids this because AWS manages the service for you.
Scales automatically
A regional NAT gateway starts at 5 Gbps of bandwidth and can scale automatically up to 100 Gbps. It can also process up to 10 million packets per second. If traffic goes beyond that limit, the gateway may drop packets.
For high availability, create one NAT gateway in each Availability Zone that contains private resources.
Supports core network protocols
A NAT gateway supports the TCP, UDP, and ICMP protocols. That means your private resources can do more than make outbound HTTPS calls; they can also run SSH connections (TCP), resolve DNS queries (UDP), and send ping checks (ICMP).
However, IPsec is the main exception. AWS recommends using NAT traversal for IPsec traffic.
Disadvantages and limits of a NAT Gateway
It bills while idle
A NAT gateway charges for every hour it exists, even if no resources use it. As of October 6, 2026, one Frankfurt NAT gateway plus its public IPv4 address costs about $41.61 per month before traffic charges.
AWS also charges $0.052 per GB that passes through the gateway, regardless of where the traffic comes from or goes. Separate AWS data-transfer charges may also apply when traffic leaves AWS for the internet.
If you run one NAT gateway in each of two Availability Zones for high availability, the fixed cost doubles to about $83.22 per month. You can use the OutboundGateway AWS NAT gateway pricing calculator to get the current regional rates before budgeting.
One zone can be a single point of failure
In zonal mode, a NAT gateway runs in one Availability Zone. If resources in other Availability Zones share that gateway and its zone has an outage, they lose internet access.
To reduce this risk, create one NAT gateway in each Availability Zone and route each subnet to the gateway in its own zone. A regional NAT gateway is another option. Both approaches increase the fixed cost because AWS bills a NAT gateway for each Availability Zone it serves.
No security groups or domain filtering
You cannot attach a security group directly to a NAT gateway. Instead, use a network access control list (NACL) on the NAT gateway's subnet and security groups on the private resources behind it.
A NAT gateway also does not filter traffic by website or domain. If you need to block or inspect traffic to specific domains, use a service such as AWS Network Firewall in front of the NAT gateway.
Connection limits per destination
Each IPv4 address on a NAT gateway supports up to 55,000 simultaneous connections to the same destination, the same destination IP address, port, and protocol.
Applications that open very large numbers of connections to one external API can reach this limit. AWS exposes the ErrorPortAllocation CloudWatch metric to help identify it. Adding secondary IPv4 addresses increases available ports; a zonal NAT gateway can use up to eight IPv4 addresses in total: one primary and seven secondary.
It works only inside its VPC and Region
Workloads outside its VPC, such as Heroku, Railway, a laptop, or workloads in another cloud provider, cannot use a NAT gateway. Traffic must start from resources inside the VPC.
You also cannot route traffic to a NAT gateway through a VPC peering connection. And an Elastic IP belongs to a network border group; for standard Availability Zones, this is the whole AWS Region. If you move to another region, you will need a new IP address and may need to update partner allowlists.
How to Create a NAT Gateway on AWS
Prerequisites
- A VPC with an internet gateway attached.
- A private subnet with the instance or workload that needs outbound internet access.
- IAM permissions to create, describe, and delete NAT gateways.
- For manual mode, one or more Elastic IP addresses to associate with the regional NAT Gateway in each Availability Zone where you want it to operate.
- For automatic mode, no Elastic IP is required upfront. AWS allocates and associates Elastic IP addresses automatically as the gateway expands across Availability Zones.
Using the AWS Management Console
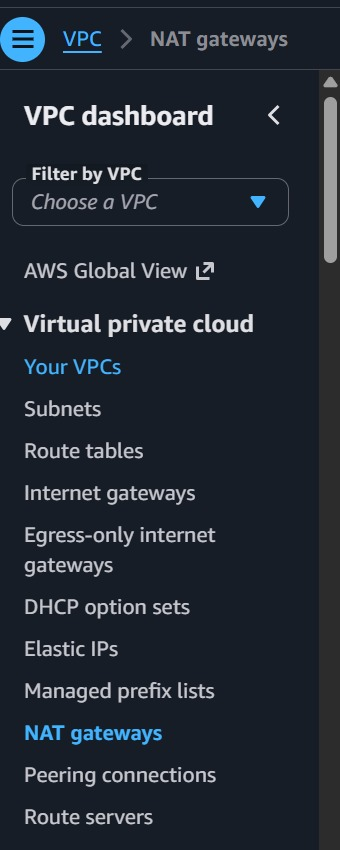
- Open the Amazon VPC console in your desired region and select NAT gateways on the left:
- Then click Create NAT gateway:
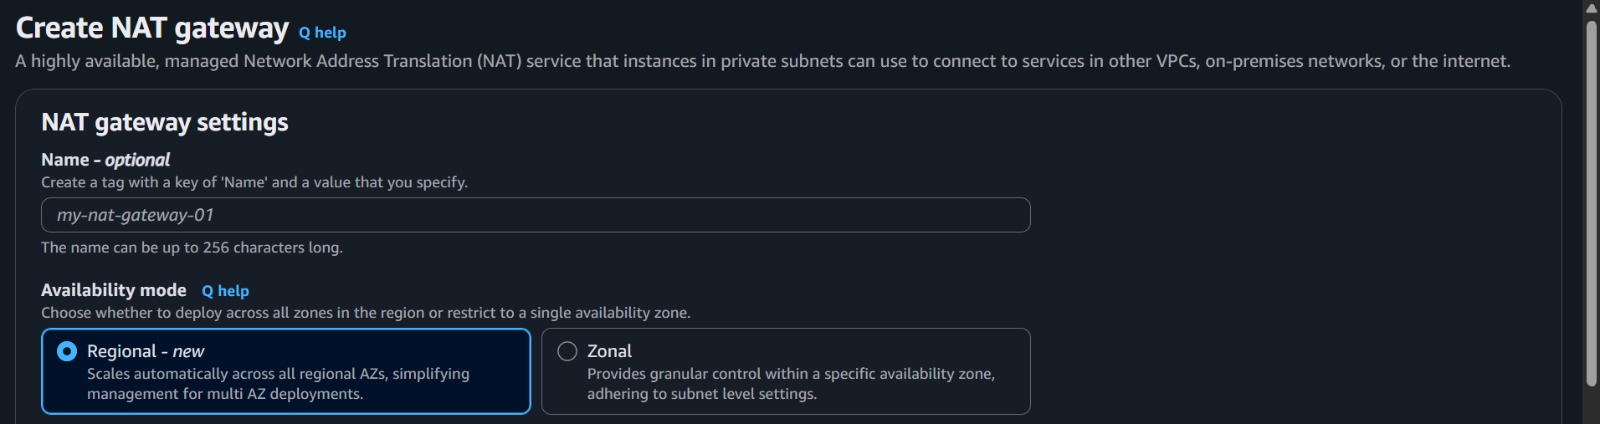
- Now you see two availability modes: Regional and Zonal. Let's choose Regional. Then you need to select the VPC in which you want to create the Regional NAT Gateway and choose the desired method: Automatic or Manual. In this example, let's choose manual:
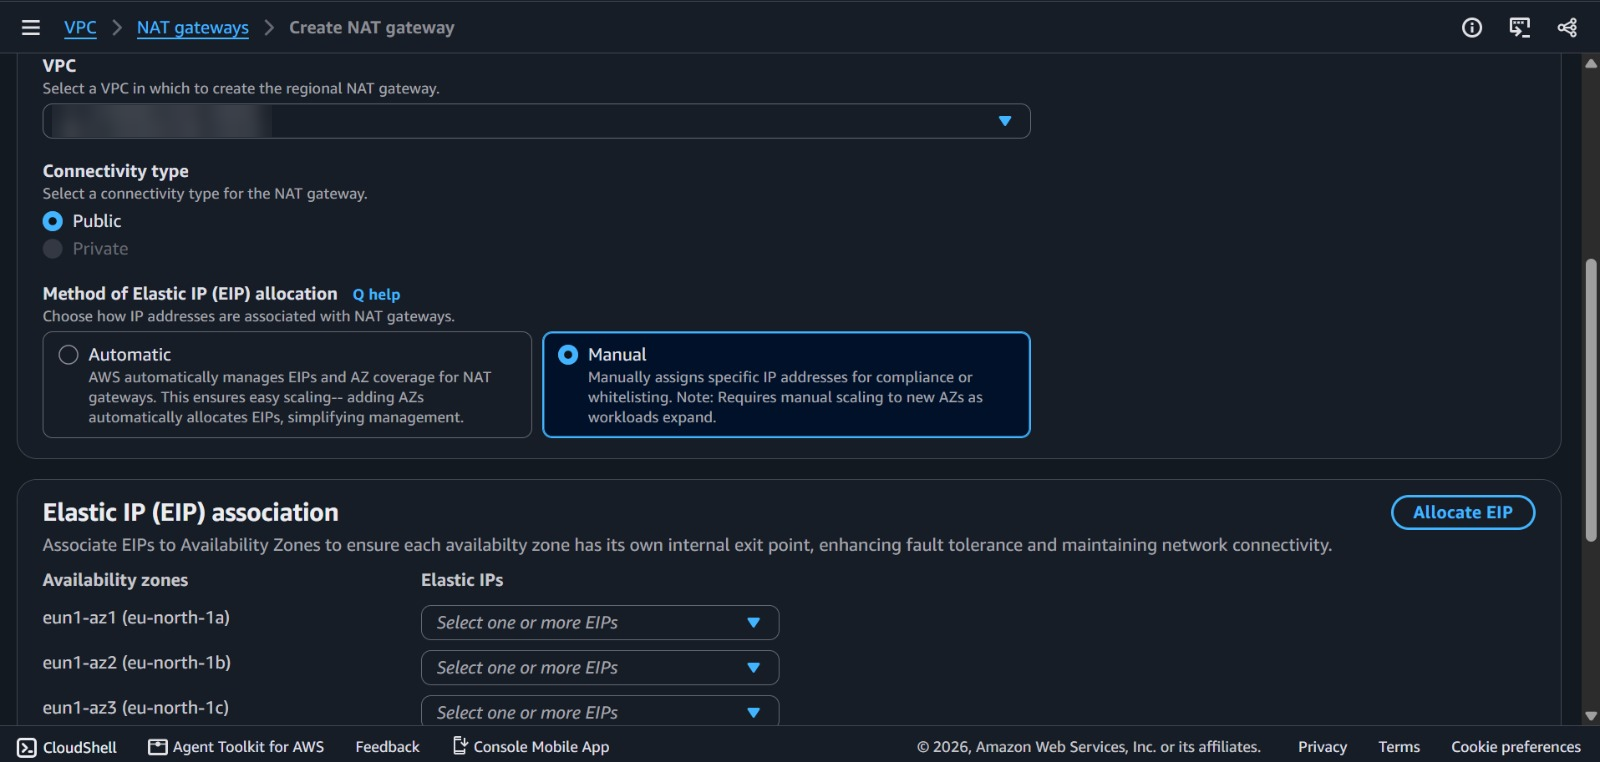
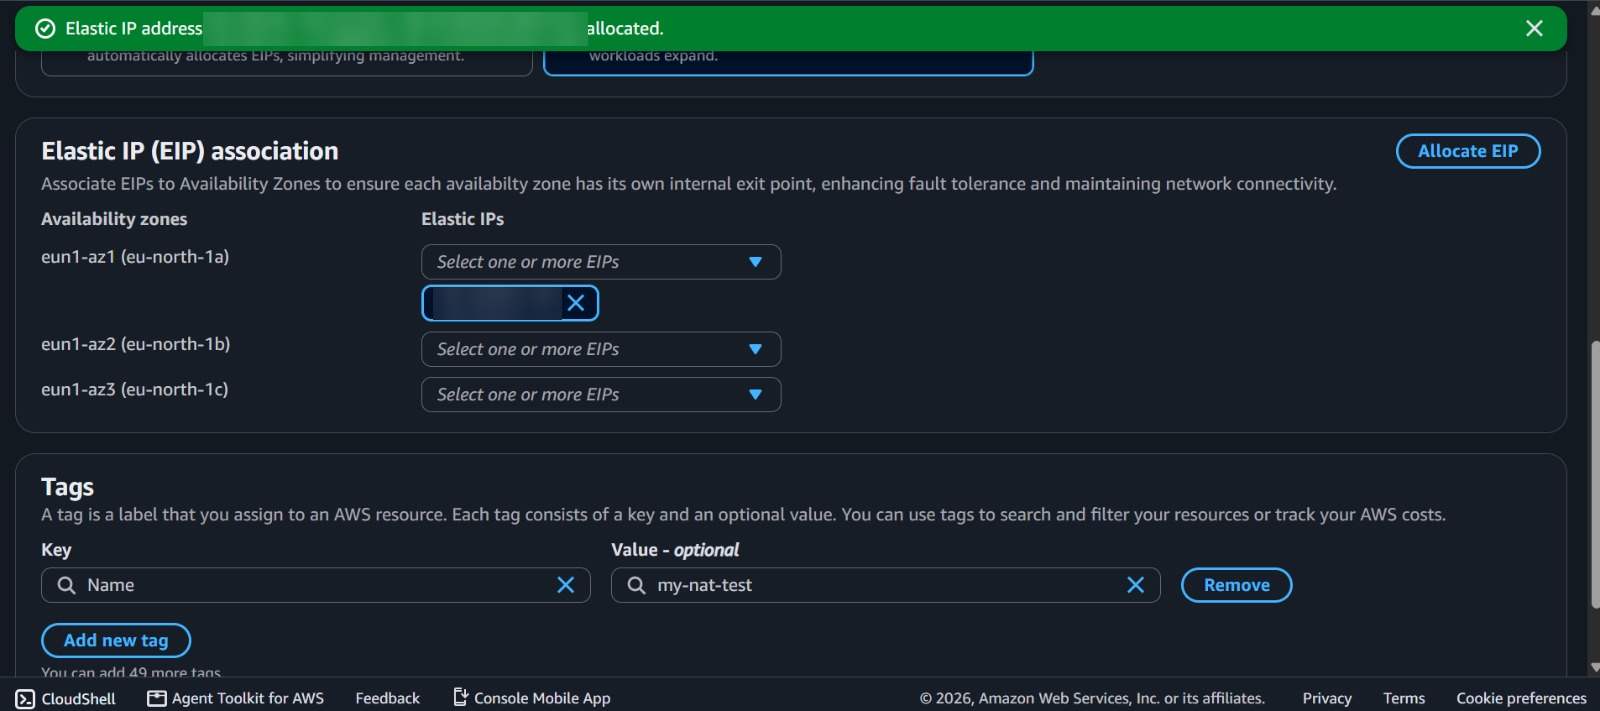
- When the manual option is selected, an EIP association drop-down menu appears where you'll need to select one or more EIP addresses for each AZ where you want the RNAT to operate, and then you click on Create NAT gateway:
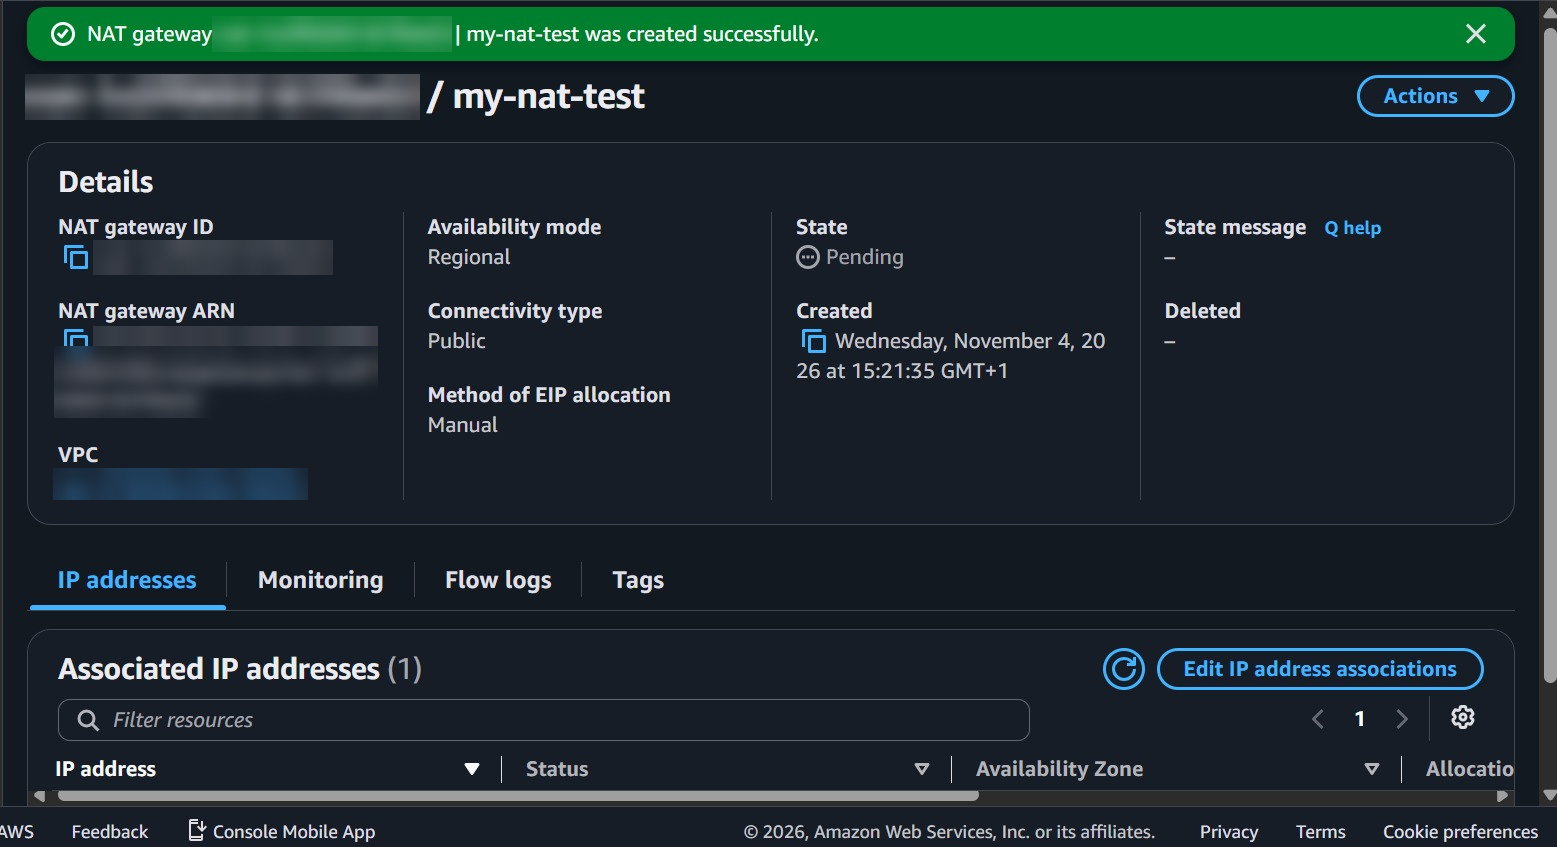
- After creation, you can view various details including the NAT Gateway ID, ARN, Availability mode, IP allocation method, Route Table ID, and associated IP addresses:
- Let's click on the Route table ID to see the RNAT routing table in more detail:
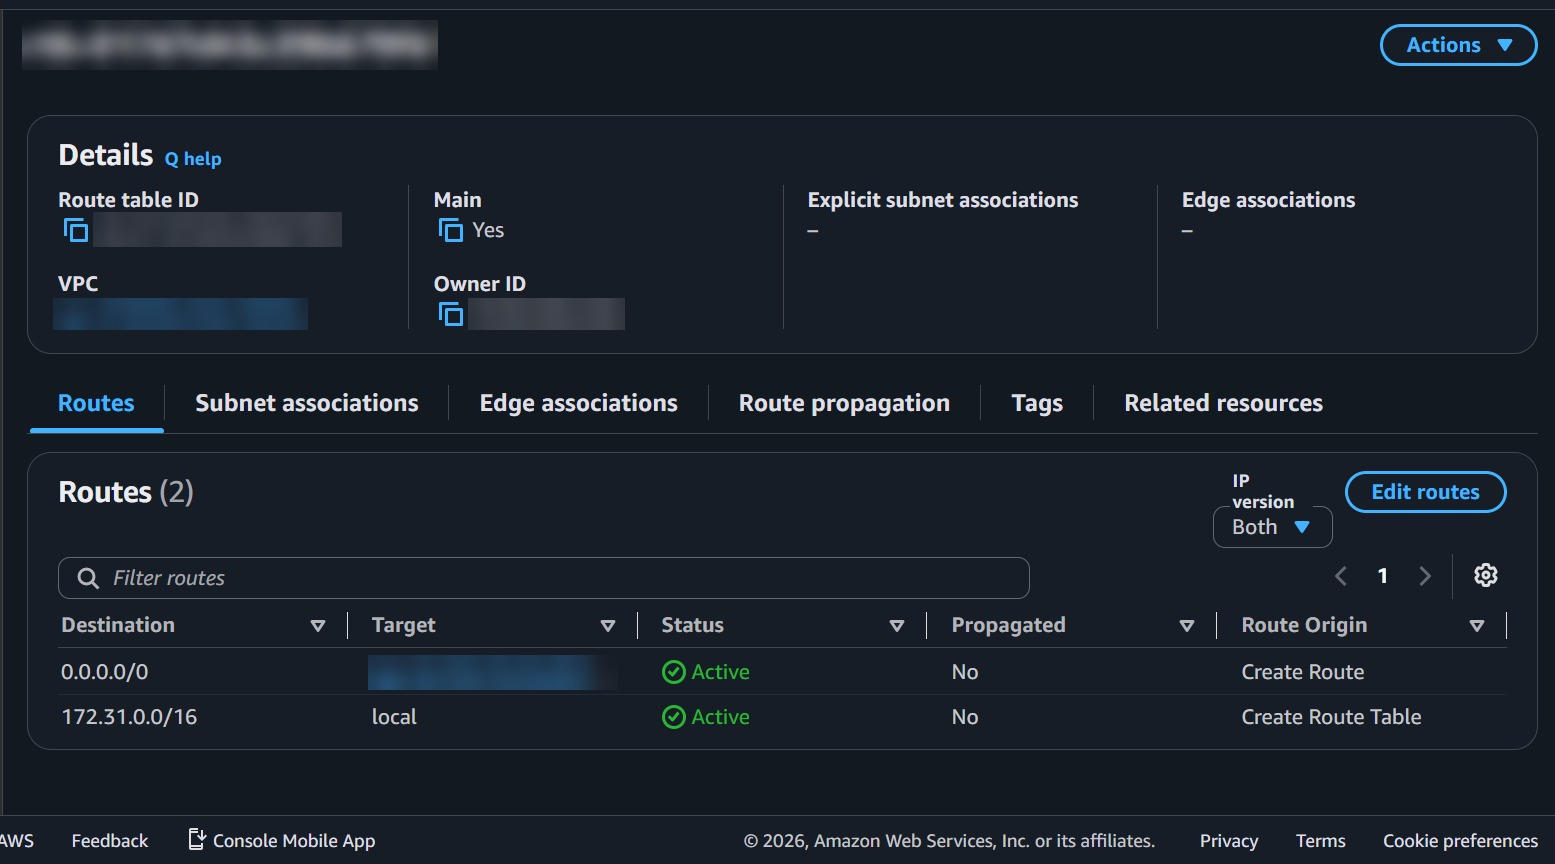
You can observe the default route (0.0.0.0/0) to the IGW, which was automatically added by AWS. You can add and edit additional routes to specific targets such as an Internet Gateway, Gateway Load Balancer/Network Firewall endpoints, or Network Interfaces.
Using Terraform
You can also create a NAT gateway with Terraform. The steps below run in AWS CloudShell, which already has the AWS CLI and your account credentials.
- Open CloudShell and install Terraform. CloudShell runs Amazon Linux, so install Terraform from HashiCorp's package repository with
dnf, then check the version:
sudo dnf install -y dnf-plugins-core
sudo dnf config-manager --add-repo https://rpm.releases.hashicorp.com/AmazonLinux/hashicorp.repo
sudo dnf install -y terraform
terraform -version
- Confirm your AWS access. This command returns your account ID and the identity you're signed in as:
aws sts get-caller-identity
- Create a project folder and move into it:
mkdir nat-gateway-test && cd nat-gateway-test
- Find your VPC ID. Copy the ID from the first column:
aws ec2 describe-vpcs \
  --region eu-central-1 \
  --query 'Vpcs[*].[VpcId,CidrBlock,State]' \
  --output table

- Check that the VPC has an internet gateway. A public NAT gateway sends traffic to the internet through it.
aws ec2 describe-internet-gateways \
  --region eu-central-1 \
  --query 'InternetGateways[*].[InternetGatewayId,Attachments[0].VpcId]' \
  --output table

- Find the route table your private subnets use. Copy its ID from the first column:
aws ec2 describe-route-tables \
  --region eu-central-1 \
  --query 'RouteTables[*].[RouteTableId,VpcId,Associations[0].SubnetId]' \
  --output table

- Write the configuration. Open a new file:
nano main.tf
Paste the configuration below. Replace the two default values with the VPC ID from step 4 and the route table ID from step 6:
terraform {
  required_providers {
    aws = {
      source  = "hashicorp/aws"
      version = ">= 6.24"
    }
  }
}

provider "aws" {
  region = "eu-central-1"
}

variable "vpc_id" {
  default = "vpc-xxxxxxxxx"
}

variable "private_route_table_id" {
  default = "rtb-xxxxxxxxxxxxxx"
}

# Create Regional NAT Gateway
resource "aws_nat_gateway" "main" {
  vpc_id            = var.vpc_id
  availability_mode = "regional"

  tags = {
    Name = "My-Regional-NAT-Gateway"
  }
}

# Route private subnet internet traffic through NAT
resource "aws_route" "private" {
  route_table_id         = var.private_route_table_id
  destination_cidr_block = "0.0.0.0/0"
  nat_gateway_id         = aws_nat_gateway.main.id
}

# Display NAT Gateway public IP addresses
output "egress_ips" {
  value = aws_nat_gateway.main.regional_nat_gateway_address[*].public_ip
}

output "nat_gateway_id" {
  value = aws_nat_gateway.main.id
}
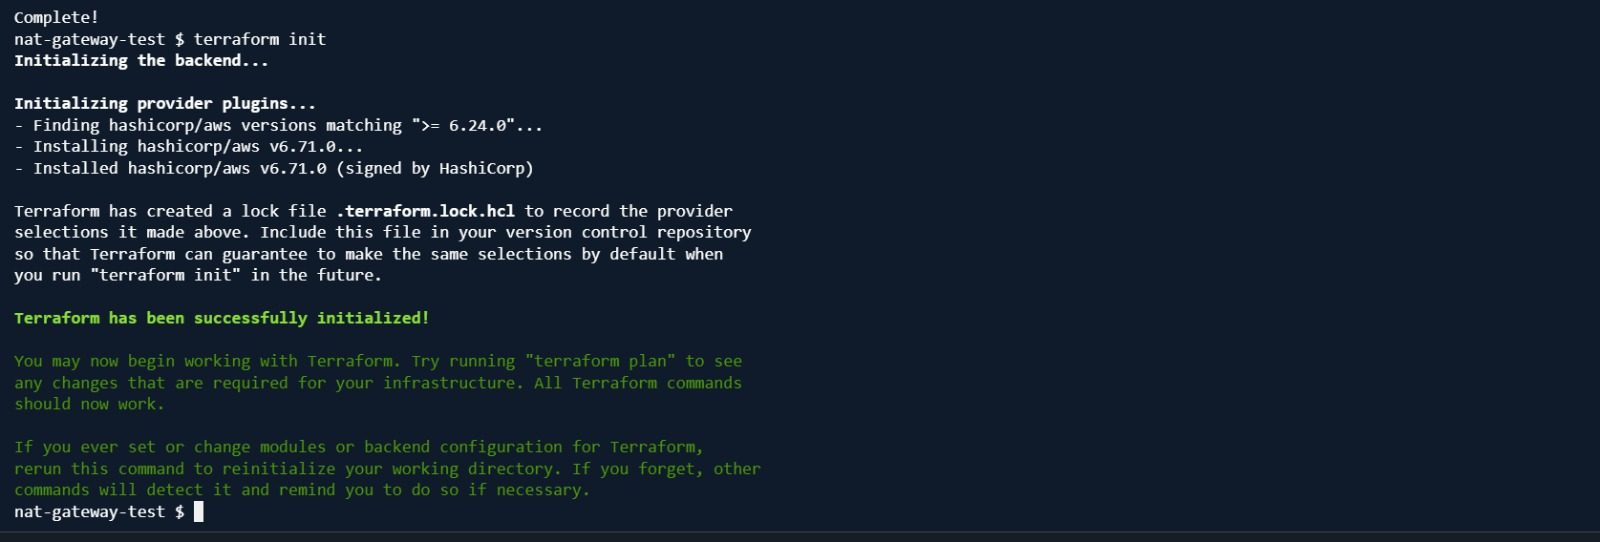
- Initialize the project. Terraform downloads the AWS provider and creates a lock file:
terraform init
- Validate the configuration. This checks the syntax and the arguments:
terraform validate
- Review the plan. Terraform lists the resources it will create:
terraform plan
- Create the resources. Terraform shows the plan again and asks you to confirm. Type
yes. Billing starts once the gateway is created.
terraform apply
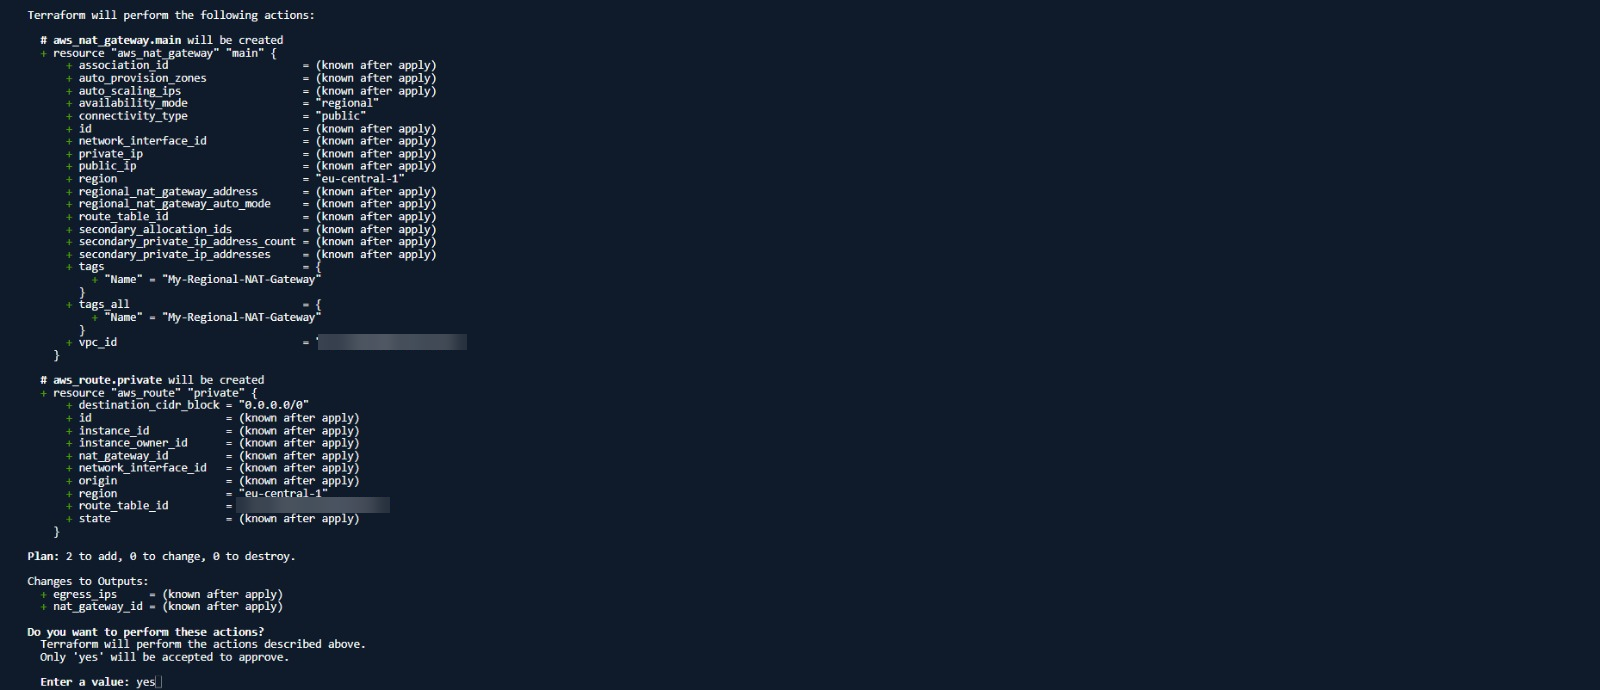
You can confirm what Terraform manages with terraform state list. This lists every resource recorded in the Terraform state.
Alternatives to a NAT Gateway
The right alternative depends on why you run a NAT gateway. Some teams want to cut the per-GB processing charge. Others only need one fixed IP for a partner's allowlist.
- VPC gateway endpoints for Amazon S3 and DynamoDB. A gateway endpoint sends S3 and DynamoDB traffic over the AWS network, so that traffic skips the NAT gateway and its processing charge. However, the gateway endpoints only cover the two aforementioned services, so you still need a NAT gateway for everything else.
- IPv6 with an egress-only internet gateway. An egress-only internet gateway gives IPv6 resources outbound access and blocks inbound connections. But this only helps when the service you call supports IPv6. However, most partner allowlists still expect an IPv4 address.
- A static outbound IP proxy. You keep your network as it is and send only the calls that need a fixed IP through a proxy. Then you add the static IPs to your partner's allowlist. This also works from platforms that have no NAT gateway at all.
How to retrieve static IPs for allowlisting from OutboundGateway
OutboundGateway is an HTTPS proxy with a pair of static, load-balanced EU IPs. It uses TLS passthrough, and doesn't decrypt your traffic. The same IPs work from AWS, Heroku, Railway, a Kubernetes cluster, or your laptop. Even if you move to another cloud, your partner's allowlist stays the same.
Get your proxy details
- Create an account on OutboundGateway. You get a 7-day free trial.
- Open Proxy info. This screen shows your plan, region, credentials, and IP addresses.
- Copy the host, port, username, and password.
- Store them as one proxy URL in an environment variable for sending calls via your partner's API.
In Windows Command Prompt:
set "OUTBOUND_PROXY=https://yourname:yourpassword@<your-proxy-host>:<your-port>"
On macOS or Linux, use export:
export OUTBOUND_PROXY="https://yourname:yourpassword@<your-proxy-host>:<your-port>"
Replace yourname, yourpassword, the host, and the port with the values from the Proxy info screen.
![OutboundGateway proxy info screen with credentials and static IPs] (/media/blog/screenshots/what_is_an_aws_gateway_13.png)
You have your static IP details! On the OutboundGateway blog, check out real scenarios on how to send requests to partner APIs like CrewAI, Composio, OpenRouter, and more with OutboundGateway static IPs.
Conclusion
A NAT gateway fits when whole private subnets need internet access and your traffic runs into hundreds of gigabytes a month.
When you only need a fixed IP for a few partner APIs, the gateway hours and the IP fee make up most of the bill. However, OutboundGateway gives your workloads static EU IPs for the calls that need them, from AWS or any other platform.
Start a 7-day trial with OutboundGateway and add its IPs to your partner's API allowlist.
Built with ❤️ for EU businesses who care about privacy and sovereignty.
NAT Gateway Frequently Asked Questions
Is a NAT gateway the same as an internet gateway?
No. The main difference is who can start a connection. An internet gateway supports two-way traffic for resources that have public IP addresses. A NAT gateway lets private resources in private subnets start outbound connections, while blocking inbound connections from the internet. However, a public NAT gateway still sends its traffic through an internet gateway.
Does a NAT gateway give you a static IP address?
Yes, a public NAT gateway uses an Elastic IP, which stays assigned until you release it. However, one NAT gateway doesn't always mean one unchanging IP. Each Elastic IP supports up to 55,000 simultaneous connections per destination, so high-volume zonal gateways can use up to 8 Elastic IPs, and a Regional NAT Gateway in automatic mode can add addresses as it expands.
If a partner requires a strict IP allowlist, you either have to manage every Elastic IP manually or route traffic through a dedicated static IP service like OutboundGateway so your IP never changes.
Do you need a NAT gateway for AWS Lambda?
Usually no. By default, Lambda functions run in an AWS-managed VPC with internet access and do not need a NAT gateway. You need one only if the function is connected to your own VPC and must reach the public internet. A VPC-connected Lambda function also does not have a fixed outbound IP by default. Our Lambda static IP guide covers the options.
How much does a NAT gateway cost?
In Frankfurt, as of October 6, 2026, a NAT gateway costs $0.052 per hour and $0.052 per GB processed. A public IPv4 address adds $0.005 per hour. The base cost is therefore $41.61 per month before data processing and data transfer charges. Our NAT gateway cost guide has the full breakdown and calculator.
Can you attach a security group to a NAT gateway?
No. AWS does not let you attach a security group directly to a NAT gateway. Use a network ACL on the NAT gateway's subnet to filter traffic at the subnet level, and use security groups on the private resources behind the gateway. The NAT gateway allows outbound traffic and the return traffic for connections that those resources started.